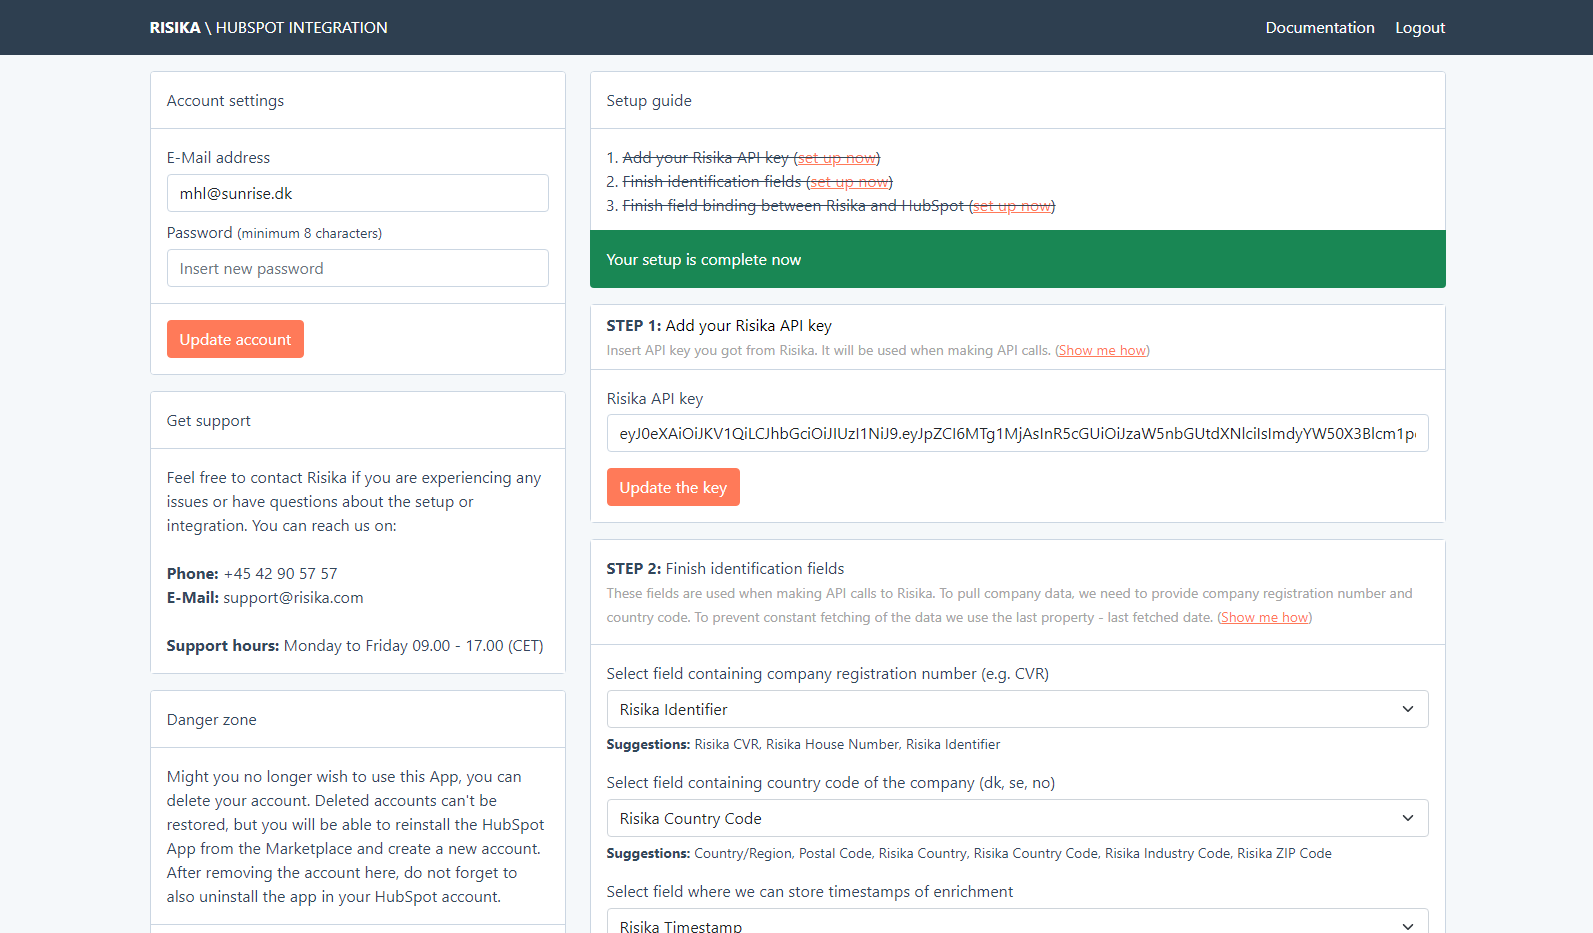
We use 3 key identifiers to ensure that the Risika data is enriched correctly in your HubSpot account: Company registration number (eg. CVR), Company country code (eg. DK, NO, SE) and timestamp of enrichment. Please note that you should not put in the exact values but only select the property that holds the information in your HubSpot account. Only properties with the correct field type will appear in the dropdown list.
If you do not have the required properties set up in HubSpot already please go to your HubSpot account and create the properties. They should be created on a company level with the field type “Single-line text”. Please make sure that the property “timestamp of enrichment” is not used elsewhere. Complete the mapping of the identification fields with your HubSpot properties in the integration settings, section 2.The binding properties are the properties in your HubSpot account you wish to enrich with the Risika data.We highly recommend that you create new properties for the selected properties and name them with prefix "Risika" (eg. Risika: Receivables) to make it easy to locate the Risika data in your HubSpot account.
All the available data fields from Risika are shown in the list for you to choose from. Please complete the mapping of the properties you want to enrich, just as in the previous step. Select “Do not synchronize this field” from the dropdown menu if you do not want to enrich the data from Risika to your HubSpot account. Be aware that a property can only be selected once. Save the changes in the bottom of the page once the mapping is complete.
Make sure that all the properties are on a company level with the field type “Single-line text”
OBS. Please pay attention to your data mapping as the integration will run and feed the Risika data into your HubSpot account once the setup is saved. It will overwrite any data values that might be on the mapped binding properties.
- Creation of a public list in Risika
- Registration of this list in your integration settings
- Creation of monitoring toggle
- Registration of the workflow
- Final testing
- Creation of a public list in Risika
- Registration of this list in your integration settings
- Creation of monitoring toggle - make sure to add two values - "Add" and "Remove". Without these two values, the sync will not work.
- Selecting toggle field in settings
- Final testing
After the initial synchronization the data will automatically be updated every day, at midnight CET.
If you need the data to be updated before that, you can make an on-demand update at any time. To do this simply clear the timestamp from the company or list of companies that you want to update. The timestamp property is the newly created property that you created in step 2.
By removing the timestamp, it will automatically let the integration know that these companies need to be updated, and the data will be updated shortly (within a few minutes). Please be aware that it might take longer if you are updating a lot of companies at the same time.
- Phone: +45 42 90 57 57
- E-mail: support@risika.com